Signal views
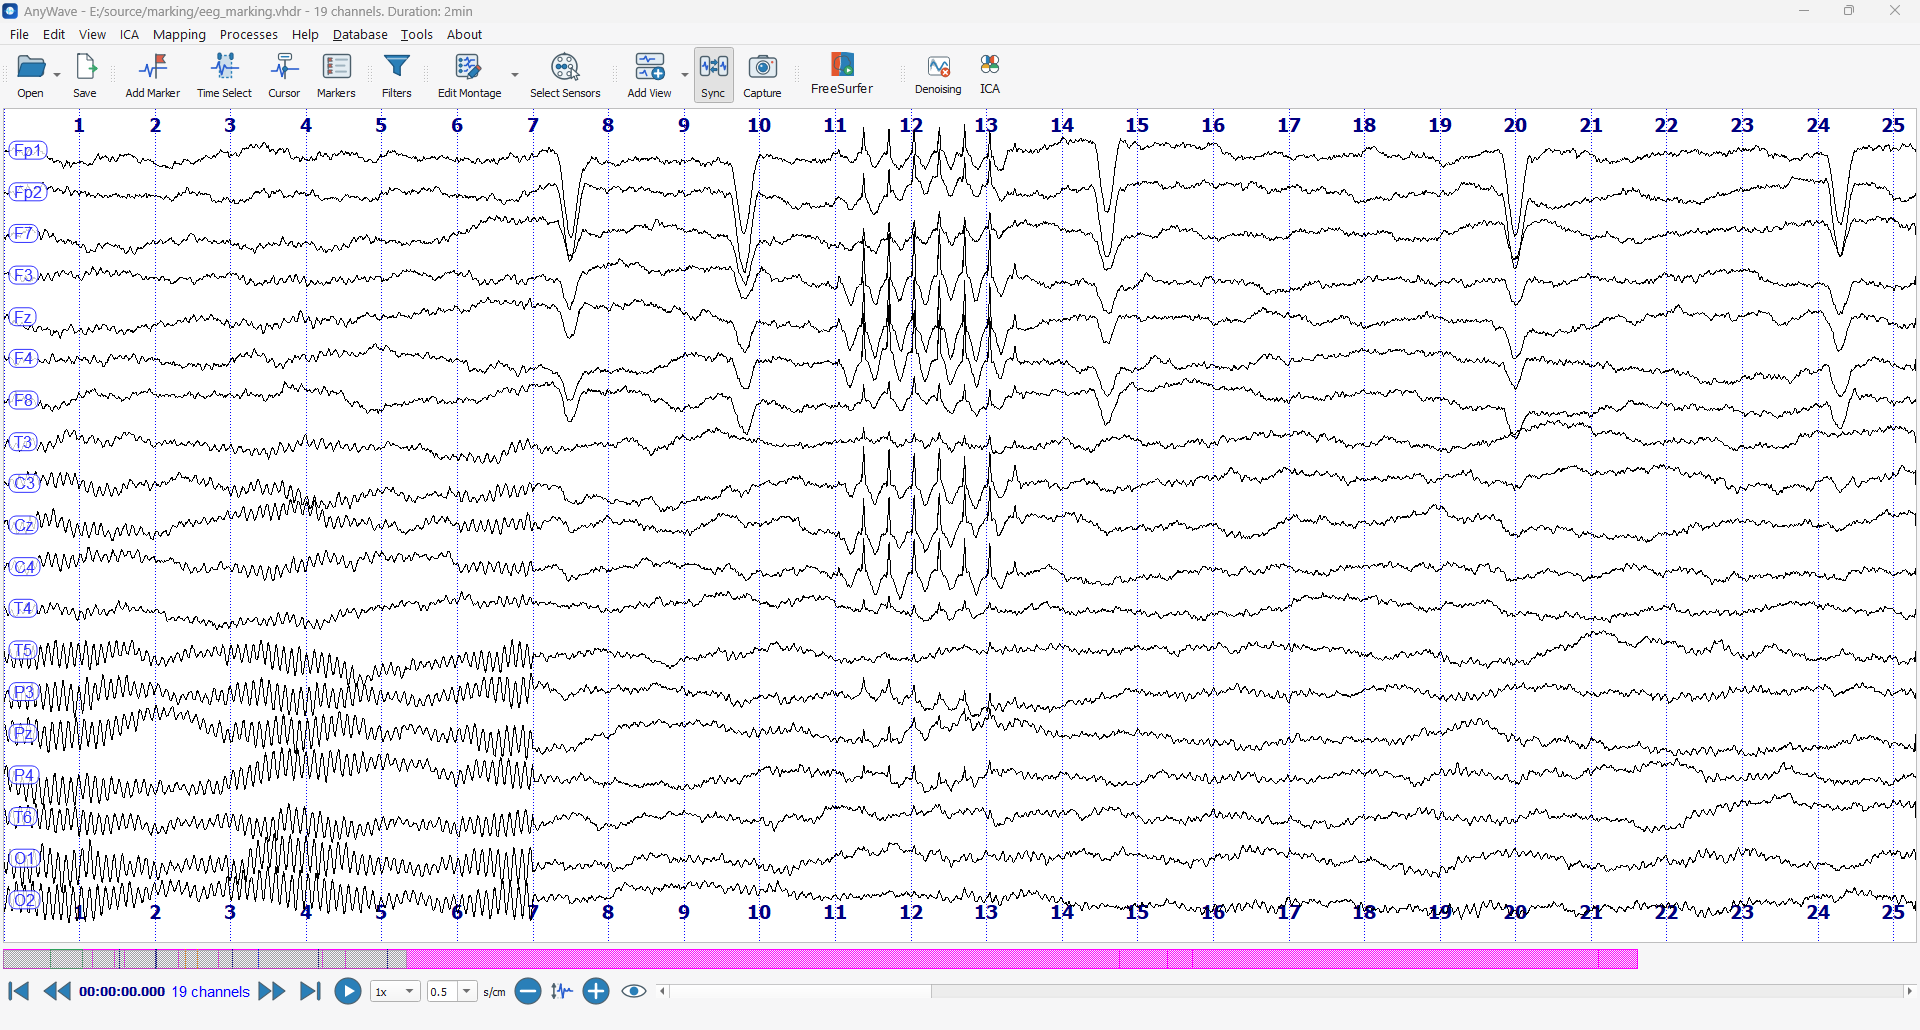
The signal view is where AnyWave shows a recording: one trace per channel, scrolling through time. You can open several views of the same recording, each with its own time scale, gain and channels. This section describes the everyday functions: opening a recording, moving through it, choosing what is displayed, selecting channels and filtering.
Open a recording
- Click Open in the toolbar and choose Open, or choose File > Open, then pick the file. AnyWave recognizes its format by itself. The title of the window gives the file, its number of channels and its duration.
- File > Recent files... lists the last recordings you opened.
- Open BIDS (in the Open menu of the toolbar and in the File menu) opens a BIDS database, and Open Database opens one of the databases you registered. If you open a recording that is inside a BIDS folder, AnyWave notices it and opens the whole BIDS folder.
When a recording is opened, AnyWave restores what you did the last time you worked on it: the montage, the filters, the gains and the markers.
The parts of the window
| Part | What it is |
|---|---|
| Menus and toolbar | The commands, see below. |
| Signal view | The traces. The name of each channel is at its left, the time grid is drawn over the traces. |
| Markers bar | The thin bar under the traces. It shows the markers of the whole recording and where you are, see Navigation. |
| Navigation bar | The buttons under the markers bar: move through the recording, time scale, gain, display settings. See Navigation. |
| Side panels | The marker list and, for a database, the BIDS panel, docked on either side. |
The toolbar

| Button | What it does |
|---|---|
| Open | Opens a menu: Open a recording, Open BIDS, Open Database. |
| Save | Saves the recording, or a part of it, in a new file with the Export Data process (same as File > Save as...). |
| Add Marker, Time Select, Cursor | Mouse modes, see Add markers. |
| Markers | Opens the marker list. |
| Filters | Opens the filters. |
| Edit Montage | Opens the montage editor. The arrow next to it applies a quick montage. |
| Select Sensors | Selects channels by their position, see Select sensors. |
| Add View | Adds a view. The arrow next to it sets how the views are aligned. |
| Sync | Synchronizes the views, see Several views. |
| Capture | Takes a picture of the views, see below. |
The toolbar also holds the buttons of the tools and plugins installed on your computer.
Save what you see
- Capture takes a screen capture of the views and saves it as a PNG file in the folder of the recording.
- File > Save display to PDF and File > Save display to SVG save what the window shows as a PDF or SVG document, which you can open in a drawing program or add to an article. They ask for the name of the file.
Mouse and keyboard at a glance
| To... | Do this |
|---|---|
| Go to the next or the previous page | Right / Left arrow, or Space for the next page |
| Go to the beginning or the end of the file | Shift+Left / Shift+Right |
| Select a channel | Click it |
| Select the channels crossed by a rectangle | Hold Ctrl and drag |
| Select all, none, or invert the selection | Ctrl+A, Ctrl+U, Ctrl+I |
| Move a channel to another position | Hold Shift and drag it |
| Open the menu of the view | Right-click in the view |
| Remove the last marker you added | Ctrl+Z |
In this section
- Navigation: the navigation bar, the markers bar, auto-scroll, going to a given time.
- Display: gain, time scale and the view settings.
- Several views: adding, aligning and synchronizing views.
- Channels: selecting channels, the menu of the view, bad channels.
- Filters: high-pass, low-pass and notch filters.