The marker list
The marker list shows every marker of the recording in a table, and is where you edit, rename, remove and count them. Open it with the Markers button of the toolbar (it opens by itself when the recording has markers).
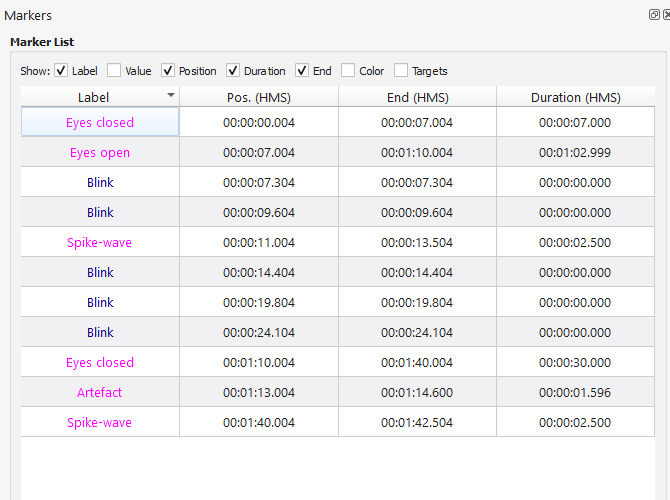
Choose the columns
The check boxes under Show decide which columns the table displays: Label, Value, Position, Duration, End, Color and Targets. Here with all of them:
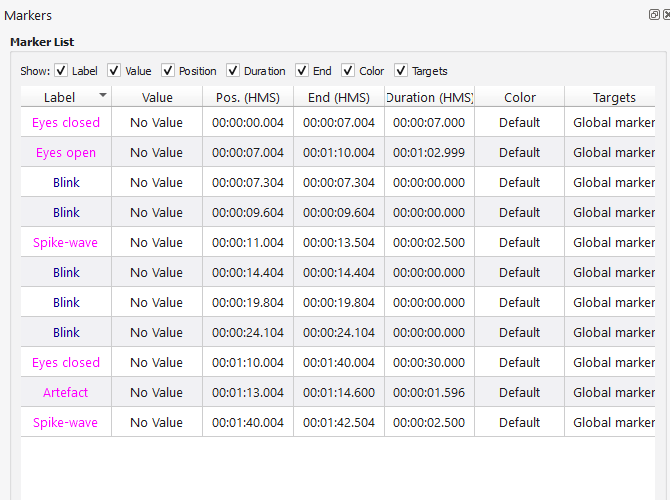
| Column | Content |
|---|---|
| Label | The label, written in the color of the marker. |
| Value | The value, or No Value when the marker has none. |
| Pos. (HMS) | The start of the marker. |
| End (HMS) | The end of the marker (equal to the start for a single marker). |
| Duration (HMS) | The duration. |
| Color | Default, or the color as #RRGGBB. |
| Targets | Global marker, or the targeted channels. The first three are listed, then .... |
The positions are shown as hh:mm:ss.mmm. To read them in seconds, change Time format in
Edit > Preferences > General.
Click a column header to sort the table; click again to reverse the order. Double-click a marker to bring the views to its position.
Edit a marker
Right-click a cell and choose Modify > Edit current marker, or select the cell and press F2, then type the new content. Every column can be edited except Targets.
- Label: any text.
- Value: a number.
- Pos., End and Duration: a time. In End,
endmeans the end of the recording. A duration cannot go past the end of the recording. - Color: a color name (
red) or#RRGGBB. Anything else gives the default color.
The marker moves in the signal view as soon as you validate.
To change many markers at once, select the rows (Ctrl-click or Shift-click) and use the other entries of the Modify menu:
| Entry | Effect |
|---|---|
| Apply the current selected value to all markers | Asks for a value (Set new value) and gives it to every marker. |
| Apply the current selected value to selected markers | Same, for the selected rows only. |
| Apply the current selected color to all markers | Opens a color picker (Pick color) and gives the color to every marker. |
| Apply the current color to selected markers | Same, for the selected rows only. |
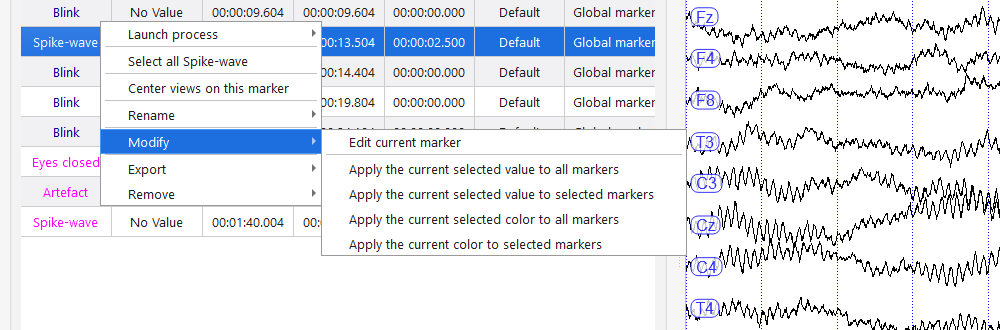
The other entries of the context menu
| Entry | Effect |
|---|---|
| Launch process | Runs a process on the selected markers. Only the processes that accept markers are listed. |
| Select all label | Selects every marker that has the same label as the one under the mouse. |
| Center views on this marker | Brings all the views to the marker. |
| Rename > Rename all markers | Asks for a new label (Set new label) and gives it to every marker. |
| Rename > Rename selected markers | Same, for the selected rows only. |
| Export > Save markers to .mrk file | Writes the selected markers to a .mrk file. |
| Remove > Remove | Removes the selected markers, after a confirmation. |
| Remove > Remove all label | Removes every marker that has this label, after a confirmation. |
Warning
Rename all markers really renames all the markers of the list. To rename only some of them, select them first and use Rename selected markers.
Count the markers
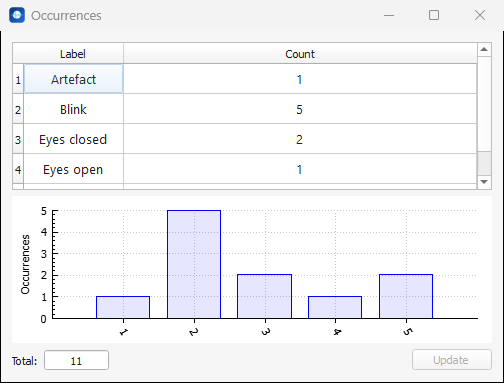
Statistics (under the list) opens the Occurrences window: how many markers there are for each label, as a table and as a bar chart, and the total.
Remove duplicates
Remove Duplicates removes the markers that are the same as another one: same label, same duration, same targets, and a position within one millisecond. Only one copy is kept. It is useful after you have loaded a file that partly repeats what you already had.
Show some of the markers only
Filter using rule (under the list) shows only the markers that match a rule you defined, see Filter rules.
Load, save and share
The buttons Load markers, Save markers, Push to common and Pull from common are described in Marker files, import and BIDS.