Add markers
You add markers with the mouse, directly on the signal. Three buttons of the toolbar change what the mouse does in the views:
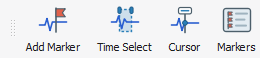
| Button | What the mouse does |
|---|---|
| Add Marker | A click adds a marker, a drag adds a selection. This page. |
| Time Select | Draw a rectangle over some channels and a time range, then pick a process to run on it. The mode switches itself off after the rectangle is drawn. |
| Cursor | A dashed cursor follows the mouse in the views and shows the time under it. |
Click the button again to leave the mode.
A single marker
- Click Add Marker.
- Click in the signal view, at the time of the event.
A marker appears at the position you clicked. Its label, value and color are the ones of the
Adding Markers Tool (by default the label is New Marker).
A selection
Press the mouse button at the beginning of the stretch you want to mark, hold it, drag to the end and release. The marker starts where you pressed and lasts until the position where you released it.
A selection shorter than 10 ms is turned into a single marker.
Markers that target channels
By default a marker is global. To attach it to some channels, hold the Ctrl key while you drag: the channels crossed by the rectangle you draw become the targets of the marker (the rectangle must be at least 10 pixels wide and tall). When several channels are crossed, AnyWave shows them and lets you choose which ones to keep.
The marker is then drawn on its channels only, and the Targets column of the marker list tells which ones.
Undo
Ctrl+Z removes the marker you added last. The Adding Markers Tool also keeps the list of the markers you added and removes the ones you select.
The Adding Markers Tool
Open it with View > Adding Markers Tool. It is a floating panel: leave it next to the data while you mark.
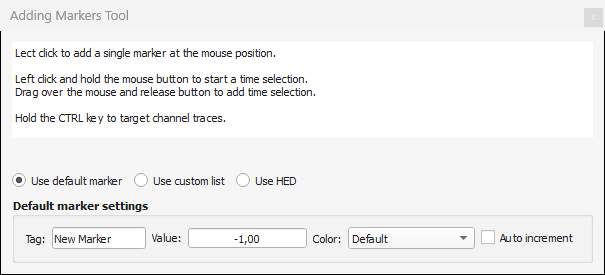
It tells how to use the mouse (click for a single marker, press-drag-release for a selection, Ctrl for channels) and decides what the next markers will be. It has three modes.
Use default marker: every marker you add gets the same properties.
| Field | Meaning |
|---|---|
| Tag | The label of the markers you add. Type it and press Enter (or click another field) to apply it. |
| Value | The value of the markers. -1 means no value. |
| Color | One of the standard colors, or Default. |
Use custom list: you keep a list of the labels you use all the time (with their value and color). When you
release the mouse, a menu of this list appears and you choose which marker to put there. Select markers to insert
at the current position at the bottom of the menu puts several of them at once. Edit changes the list.
The list is saved in the file custom_list.mrk of your Markers folder, a
regular .mrk file.
Use HED: the menu proposes the tags of the HED vocabulary (Hierarchical Event Descriptors) delivered with AnyWave, instead of your own labels.
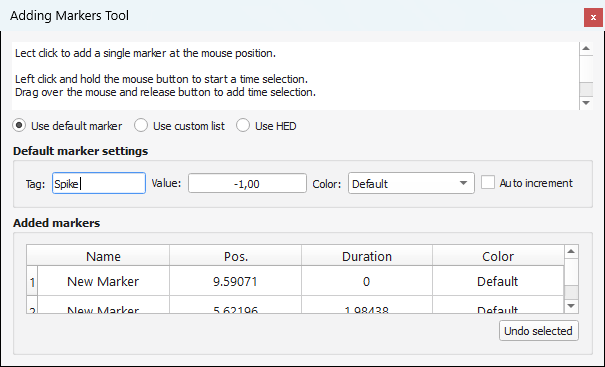
The Added markers table at the bottom (it appears with the first marker you add) lists what you added in this session, with its name, position, duration and color. Select rows and click Undo selected to remove them.
Note
A marker you add is saved at once, in the .mrk file that sits next to the recording
(see Marker files, import and BIDS). There is no "save" button to remember.
Time Select
Click Time Select, then draw a rectangle on the traces: its height selects the channels, its width the time range. When you release the mouse, a menu lists the processes that accept a time selection. The one you choose runs on the channels and the time range of the rectangle, and the mode switches off.
A rectangle smaller than 10 pixels, in height or in width, is ignored.
Cursor
Click Cursor: a dashed vertical cursor follows the mouse in the views. Its label gives the time under the
mouse, as hh:mm:ss.mmm when the grid shows the Recorded time, in seconds when it shows the Relative time (see
the View settings). Click Cursor again to remove it.